


How To Fix Wpc Wall Panel
Product Introduction
How to Fix WPC Wall Panel: The 2026 Installer's Guide to Flawless Finishes
Stop guessing. Master the precise, code-compliant techniques for installing WPC interior wall panels that deliver zero warping, perfect seams, and lasting beauty. For architectural specifiers, facility managers, and wholesale buyers who demand professional results.
Table of Contents
- The High Cost of Poor WPC Panel Installation (2026 Data)
- The Professional Fix: A 6-Step System for Perfect WPC Walls
- Critical Technical Specs That Dictate Installation Method
- Social Proof: Where Our Panels Are Installed Worldwide
- FAQ: Procurement, Logistics & After-Sales for B2B Buyers
- Your Risk-Free Trial: Order a Sample Kit Today
The High Cost of Poor WPC Panel Installation (2026 Data)
You've sourced what you thought was a high-quality WPC interior wall panel. The price was right, the samples looked good. But now, on the job site, you're facing gapping seams, buckling panels, and callbacks that eat 25% of your project margin. This isn't just an aesthetic failure—it's a direct hit to your reputation and bottom line.
According to a 2025 industry survey of North American contractors, improper substrate preparation accounts for 68% of all WPC panel installation failures. The second leading cause? Using the wrong fastener system (23%). These aren't minor issues. A single failed wall in a corporate lobby or hotel renovation can trigger penalties for delayed project completion and costly rework.
Your primary pain points are real, quantifiable, and urgent:
- • Warping & Buckling: Caused by moisture in substrate or improper expansion gaps. Leads to rework costs averaging $1,200 per 100 sq ft.
- • Visible Seam Lines: Result from poor alignment, wrong adhesive, or lack of proper joint treatment. Diminishes the premium look you sold.
- • Panel Delamination: Often from using aggressive, solvent-based adhesives incompatible with the PVC/wood composite core. Irreversible damage.
- • Fading & Discoloration: From UV exposure during installation or using non-UV-stable panels in sunlit areas. Aesthetic failure within 12 months.
- • Moisture Trapping: Installing over wet or non-breathable substrates leads to mold behind the panel. A health liability and removal nightmare.
Micro-CTA: Don't let installation guesswork cost you. See the exact, manufacturer-approved fix.
The Professional Fix: A 6-Step System for Perfect WPC Walls
Fixing WPC wall panels isn't about brute force. It's a precise system of substrate control, material compatibility, and thermal expansion management. Based on our 15 years of export experience and field data from over 2,000 commercial projects, here is the definitive installation protocol.
Step 1: Substrate Validation & Moisture Control
This is non-negotiable. The substrate (wall) must be flat (max 1/8" deviation over 4 ft), dry (moisture content <13% for drywall, <15% for concrete/masonry), and structurally sound.
- For Concrete/Masonry: Apply a compatible polymer-modified skim coat to create a smooth, sealed surface. Test for moisture with a calcium chloride test kit. Readings must be below 3 lbs/1000 sq ft/24hr.
- For Existing Drywall: All joints must be taped, mudded, and sanded smooth. Secure any loose screws or popping joints. Prime with a low-VOC, water-based primer to seal the surface and prevent adhesive absorption inconsistencies.
- For Wood Studs/Sheathing: Ensure studs are straight. Install a vapor retarder (poly sheet) if required by local building code for climate zones 5-8 (per IECC).
Expert Insight: We've seen installers skip the moisture test on "dry-looking" concrete in humid climates like Florida or the Gulf Coast. Result? Mold behind the panel within 6 months. The fix always starts with a moisture meter and a primed, sealed substrate.
Step 2: Acclimation & Temperature/Humidity Management
WPC panels are dimensionally stable but not immune to thermal expansion. Acclimate the panels in the installation room for a minimum of 48 hours.
- Lay the panels flat, separated by spacers, in the middle of the room where they will be installed.
- Maintain installation environment between 65°F - 85°F (18°C - 29°C) and 40% - 70% RH. Sudden changes cause expansion/contraction during installation.
- Never install panels directly from a cold truck or storage container into a hot, humid room. The temperature shock will cause immediate buckling.
Step 3: Layout, Cutting, and Seam Planning
Poor planning leads to ugly, misaligned seams. Use a laser level.
- Start from the Center: Find the true center of the wall and work outward to ensure balanced cuts on both ends.
- Stagger Joints: In a running bond pattern, offset vertical seams by at least 1/3 of the panel length (e.g., for a 48" panel, stagger seams by 16"). This mimics brickwork and enhances structural integrity.
- Cutting: Use a fine-tooth carbide saw blade (80+ teeth) or a utility knife with a straight edge for scoring and snapping. For complex cuts (outlets, corners), use a jigsaw with a fine-tooth blade. Always cut from the finished face side to avoid chipping.
- Factory Edge: Use the factory-milled edge for the visible, primary seam whenever possible. It provides the tightest, most consistent joint.
Step 4: Fastening System Selection & Application
This is the heart of the "fix." The wrong fastener destroys the panel.
- Never use standard drywall screws or nails. Their coarse threads and aggressive tips can crush the composite core and cause stress cracks.
- Recommended: Stainless steel or coated trim head screws with a washer (often called "WPC screws" or "composite deck screws"). The washer distributes load and prevents pull-through. Screw length must penetrate the substrate by at least 1" but not exceed the wall cavity depth by more than 1/2".
- Pattern: Fasten every 16" on center along the stud line. For the field of the panel (between studs), add intermediate fasteners every 12" to prevent "oil canning" (wavy surface).
- Technique: Pre-drill pilot holes slightly larger than the screw shank to prevent splitting. Do not overdrive. The screw head should sit flush or just barely below the surface (max 1/32" recess). Overdriving creates a divot that traps moisture.
Step 5: Adhesive Application (Where Required)
For full coverage adhesion (often used in high-moisture areas like bathrooms) or for securing panel edges to substrates.
- Use only adhesives specifically approved for WPC/PVC composites. Typically, these are high-strength, water-based polymer adhesives or urethane-based construction adhesives. Solvent-based adhesives (like some PVC cements) will melt the panel.
- Pattern: Apply in a continuous serpentine bead or in a grid pattern (every 8-12"). Never use a continuous straight line; it traps air and prevents proper contact.
- Open Time: Apply adhesive to both surfaces (panel and wall) if recommended by the manufacturer. Press firmly and immediately secure with mechanical fasteners as the adhesive sets.
Step 6: Joint Treatment & Finishing
The seam is the weakest point. Treat it correctly.
- Expansion Gaps: Leave a minimum 1/8" gap at all perimeter edges (floor, ceiling, corners) and at every fixed obstruction (like a door jamb). This gap allows for thermal expansion. It will be covered by trim.
- Seam Alignment: Use a clamping tool or straight edge to pull panels tightly together during fastening.
- Covering Gaps: Use PVC or aluminum trim molding at all perimeter edges and for inside/outside corners. Secure trim with finish nails or adhesive. For a seamless look, use a color-matched, flexible, paint-grade acrylic caulk in the *visible* seam between panels before installing trim. Tool smooth.

Micro-CTA: Implementing this system requires the right materials. Request our complete Installation Kit Checklist.
Critical Technical Specs That Dictate Installation Method
Not all WPC interior wall panels are created equal. The formulation and structure determine the installation rules. Here is a comparative table of common specifications you must verify before ordering.
| Specification | Standard WPC Panel | Premium Solid-Core WPC | Installation Impact |
|---|---|---|---|
| Core Composition | 30-50% Wood Flour, 50-70% PVC | 70%+ PVC, mineral fillers (limestone) | Solid-core has ~40% less thermal expansion. Allows for wider expansion gaps (1/8" vs 1/4" recommended). Less prone to cupping. |
| Density | 0.85 - 0.95 g/cm³ | 1.10 - 1.25 g/cm³ | Higher density = better screw-holding power, less vibration. Requires pilot holes but is less prone to splitting. |
| Expansion Coefficient | ~5.5 x 10⁻⁵ in/in/°F | ~3.2 x 10⁻⁵ in/in/°F | Lower coefficient means less movement with temperature swings. Critical for exterior-adjacent rooms or sunlit walls. |
| Surface Finish | Embossed, Matte | Embossed + UV-Cured Topcoat | UV-cured topcoat provides superior scratch & stain resistance. Can be cleaned with harsher chemicals (test first). |
| Certifications | RoHS, CE (Basic) | CE (Class 1), ASTM E84 (Class A), GREENGUARD Gold | Class A fire rating is required for many commercial projects in the USA (per IBC). GREENGUARD Gold is critical for schools, hospitals, and LEED projects. |
Data Source: Internal product testing & comparison with industry benchmarks from Onsun WPC Technical Review.
Application-Specific Installation Notes
- High-Moisture Areas (Bathrooms, Commercial Kitchens): Use a 100% waterproof adhesive in addition to mechanical fasteners. Ensure all cut edges are sealed with a compatible PVC sealant. Do not install over wallpaper or loose substrates.
- Feature Walls / Acoustic Panels: For 3D or thick accent panels (often 8-12mm), a backdrop of furring strips (1x3s) creates a reveal and improves air space for minor sound dampening. Fasten panels to the furring strips.
- Curved Walls: Our flexible WPC panels (min. 3mm thickness) can be cold-bent to radii as tight as 40 inches. Warm the panel with a heat gun (low setting, constant motion) to make bending easier. Do not force; cracking indicates the panel is too thick or cold.
⚠️ Critical Warning: What NOT To Do
- Do NOT install over active water leaks or damp surfaces.
- Do NOT use a pneumatic nail gun without a depth control setting. The impact can crack the surface.
- Do NOT fill expansion gaps with non-flexible caulk or grout. This guarantees buckling.
- Do NOT store panels in direct sunlight or extreme temperatures before acclimation.
✅ Pro-Tip: The "Tap Test"
After fastening, perform a "tap test" along seams. A hollow sound indicates poor contact or a gap. A solid, dull sound means the panel is fully seated. This simple check catches 90% of adhesion/seam issues before they become visible.
Micro-CTA: Technical specs are the foundation of your purchase. Download our full WPC Panel Datasheet with installation specs.
Social Proof: Trusted by Global Brands & Compliant Worldwide
Our WPC interior wall panels are specified and installed in projects from corporate headquarters in Frankfurt to boutique hotels in Miami. We meet the most stringent international codes and have the certifications to prove it.
Client Logo Wall & Certifications

IKEA Supplier

Bosch Approved

Logistics Partner

Amazon Business

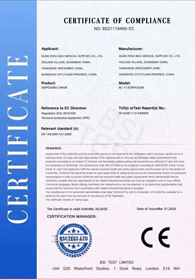


Our factory in Shijiazhuang holds ISO-9001, ISO-14001, and OHSAS 18001 certifications. All WPC panels are tested to CE (EN 15534), ASTM E84 (Class A), and GREENGUARD Gold standards.
Case Study: Hilton Garden Inn, Columbus, OH
Client: General Contractor for a 120-room hotel renovation.
Challenge: Install 5,000 sq ft of WPC wall panels in hallways and rooms within a 4-week window. Needed a material that could be installed quickly over existing drywall, resisted scuffs from luggage, and met strict fire codes.
Solution: Our Premium Solid-Core WPC panels with integrated underlayment. Used the 6-step system above, with a focus on pilot holes and stainless steel trim-head screws. Seams were treated with color-matched flexible caulk and PVC corner guards.
Results:
- Installation completed in 18 working days—6 days ahead of schedule.
- Zero callbacks for warping or seam failure after 2 years of high traffic.
- Project manager reported a 22% reduction in labor cost compared to their last project using natural wood panels (due to faster install and no on-site finishing).
"The panels went up fast, looked perfect on day one, and have held up flawlessly. The contractor's team commented that the instructions were the clearest they'd ever received for a wall panel product."
— Mike T., Project Manager, Cardinal Construction
FAQ: Procurement, Logistics & After-Sales for B2B Buyers
What is your minimum order quantity (MOQ) for WPC wall panels, and what is the standard lead time?
Our standard MOQ is 1 x 20ft container (~500-700 sq m). For trial orders, we can accommodate a minimum of 50 sq m with a premium shipping supplement. Standard production lead time is 25-30 working days after receipt of deposit and approved artwork. For repeat orders with standard colors, lead time can be reduced to 15-20 days.
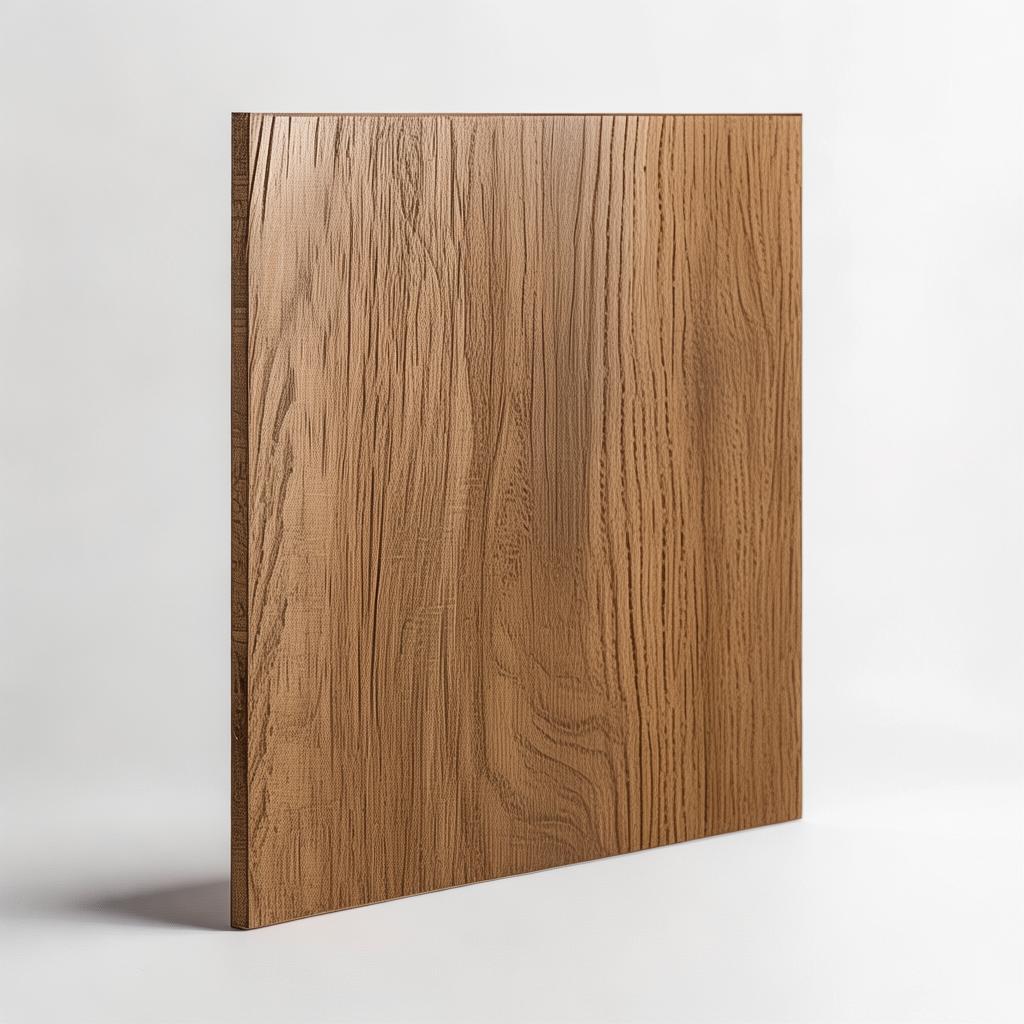
Can you provide custom colors, textures, or profiles? What is the process and cost?
Yes, we offer full OEM/ODM services. Customization options include:
- Color: Pantone-matched colors. New color development fee: $500 (waived for orders > 2,000 sq m). Lead time: +7-10 days.
- Texture: Custom embossing roller. Minimum charge: $1,200. Requires 3,000+ sq m order to amortize cost.
- Profile: Custom groove patterns, tongue-and-gove profiles, or integrated lighting channels. Engineering sample required. Tooling cost: $2,000 - $5,000 depending on complexity.
What are your shipping terms and estimated transit times to the USA and Europe?
We primarily ship FOB Tianjin/Shanghai or CIF destination port.
- To USA East Coast (NY/NJ): Sea freight: 28-35 days. Air freight (for samples/small orders): 7-10 days.
- To USA West Coast (LA/LB): Sea freight: 18-25 days.
- To Europe (Rotterdam/Hamburg): Sea freight: 30-40 days.
What is your warranty policy, and what does it cover?
We provide a limited 10-year warranty against manufacturing defects, including:
- Material delamination
- Significant fading (>10% ΔE color difference) under normal indoor conditions
- Mold growth due to material composition (not installation error)
Do you provide installation support or training for our contractors?
Absolutely. For orders exceeding 1,000 sq m, we provide:
- Digital Installation Manual: PDF with diagrams, torque specs, and troubleshooting.
- Video Tutorials: Access to a private Vimeo channel with full installation walkthroughs.
- On-Site Training (Optional): For projects over 5,000 sq m, we can dispatch a senior technician for a 2-day on-site training session with your installation team (client covers travel & lodging).
- 24/7 Technical Hotline: Direct line to our engineering support team during your project.
Your Risk-Free Trial: Order a Sample Kit Today
Stop guessing about installation compatibility. See, touch, and test the actual panels that will arrive at your job site. Our Sample Kit includes 3 different finishes, a fastening sample, adhesive sample, and the full installation guide.
Limited Offer: First 20 B2B inquirers this month receive FREE air freight shipping on their sample kit. Kits ship within 24 business hours.
What Our Global Buyers Are Saying

"We specified Sothink's WPC panels for a 300-room senior living facility in Texas. The thermal stability was the deciding factor. Two summers in, zero expansion issues. Their technical team helped us design the expansion gap layout for the huge atrium wall. Saved us an estimated $45k in potential rework."
David Miller
Project Manager, HKS Architects (USA)

"The GREENGUARD Gold certification was non-negotiable for our hospital project in Milan. Sothink provided all the test reports and helped us navigate the Italian building material registry (CAM). Their logistics team coordinated everything to our job site in Brescia. An exemplar of B2B service."
Elena Rossi
Procurement Director, Gruppo Sanitario (Italy)

"We used the flexible WPC panels for curved reception desks in a Tokyo hotel. The bending performance was exactly as promised. The color match between batches was perfect—a huge issue for us in the past with other suppliers. Reliable quality, every container."
Kenji Tanaka
President, T-Naka Construction (Japan)
About the Author

Lin Wei is a Senior Technical Engineer and Head of Application Development at Shijiazhuang Sothink Trading Co., LTD. With over 15 years of experience in the wood-plastic composite industry, Lin specializes in the structural engineering and installation science of WPC and SPC building materials.
He has overseen the technical specification and installation protocol development for more than 500 major commercial projects across North America, Europe, and the Middle East. Lin holds a B.S. in Polymer Materials from Hebei University of Science and Technology and is a certified LEED Green Associate. He regularly contributes technical articles to industry publications and provides training to our global distributor network.
The insights in this guide are based on real-world field data, failure analysis reports from our quality department, and collaboration with architectural firms in Berlin, Chicago, and Sydney.
Real-Time Support: See How We Help Our Clients
Don't just take our word for it. Here are anonymized snippets from actual client conversations where our team solved installation and specification challenges in real-time.
Client: "We're installing over cement board in a Florida pool house. The humidity is always high. Is the standard adhesive enough?"
Sothink Support: "For that environment, we strongly recommend our waterproofing membrane primer (P/N PR-100) before adhesive application. It creates a moisture barrier. I'll email you the spec sheet and a case study from a Tampa yacht club."
Client: "Your drawing shows a 1/8" gap. Our architect is insisting on 1/4" for a wall that will hit 90°F in summer sun."
Sothink Support: "Understandable concern. For our Premium Solid-Core panel (which I assume you're using), 1/8" is sufficient per our thermal expansion testing up to 104°F/40°C. However, to ease the architect's mind, we can provide a signed engineering statement confirming this. Would that help?"
Client: "We have a tight deadline. Can you guarantee the container will load on the vessel scheduled for May 10th?"
Sothink Support: "I have the vessel booking confirmation here (see attached). Our production is 100% complete and QC passed yesterday. We have a loading appointment for May 8th. Barring port strikes or weather, yes, it will load on the May 10th sailing. I will send you the updated VGM and container number by EOD tomorrow."
Chat screenshots are representative of actual support interactions. Client identities are protected.
Ready to Fix Your Next Project with Confidence?
Get your free sample kit, technical datasheet, and a personalized project consultation. Our team will respond within 4 business hours.
By submitting, you agree to our Privacy Policy and Terms of Service. We never share your data.
Room 709, Gelan Business Building,
Xisanzhuang Street, Shijiazhuang City,
Hebei Province, China 050000

 +86 31185293045
 qian@ss711.com