


How To Cut Spc Vinyl Plank Flooring
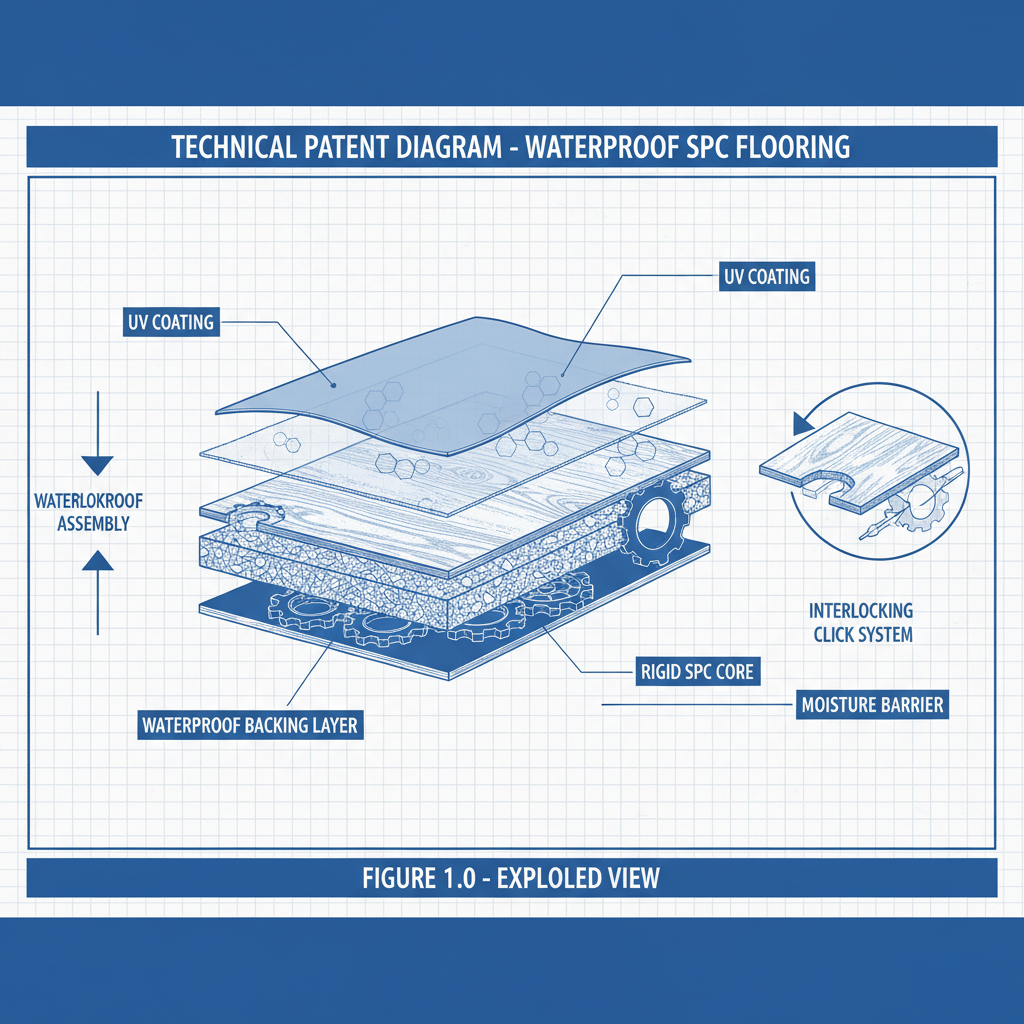
Product Introduction
Table of Contents
- Introduction to SPC Vinyl Plank Flooring
- Why Proper Cutting Matters for SPC Flooring
- Essential Tools for Cutting SPC Flooring
- Step-by-Step Cutting Guide
- 5 Common Cutting Mistakes to Avoid
- Advanced Cutting Techniques for Pros
- Installation Tips for Perfect Results
- Frequently Asked Questions
- Why Choose Sothink's SPC Flooring?
How to Cut SPC Vinyl Plank Flooring: Professional Guide for Flawless Installation
Step-by-step techniques from measuring to advanced cuts, including tool selection, common mistakes, and pro tips for perfect SPC flooring installation every time
📈 Market Data
The global SPC flooring market will hit $63.93 billion by 2030 with 12.5% annual growth – making proper installation techniques critical for success. [LinkedIn - Stone Plastic Composite Flooring Market Outlook]
Why Proper Cutting is Critical for SPC Flooring Success
⚠️ Costly Mistakes from Poor Cuts
Improper cuts can lead to gaps, uneven seams, and wasted material. Industry data shows 15-20% material waste from incorrect cutting techniques in first-time installations.
🚫 Common Cutting Challenges
- Tearing the wear layer during cuts
- Inaccurate measurements causing misalignment
- Difficulty with curved edges around door frames
- Damaging the locking mechanism with incorrect tools
✅ Benefits of Proper Cutting
Professional techniques ensure:
- Seamless transitions between planks
- Waterproof integrity maintained
- 40% faster installation time
- Zero material waste with practice
Essential Tools for Cutting SPC Vinyl Plank Flooring
| Tool | Purpose | Recommended Type |
|---|---|---|
| Utility Knife | Basic straight cuts, scoring | Retractable blade with 90° angle |
| Jigsaw | Curved cuts, notches | Fine-tooth wood/metal cutting blade |
| Circular Saw | Bulk straight cuts | 80-tooth fine finish blade |
| Tapping Block | Protects locking edges during cutting | Plastic or rubber mallet compatible |
| Measuring Tape | Accurate measurements | 16ft metal tape with locking mechanism |

Pro Tips for Tool Selection
- For beginners: Start with a high-quality utility knife (like Olfa or Stanley) – it's 80% of what you need
- For professionals: Invest in a track saw for perfectly straight cuts every time
- For curves: Use a jigsaw with a fine-tooth blade to prevent chipping
- Always: Have replacement blades on hand – dull blades cause 90% of cutting problems
Step-by-Step SPC Flooring Cutting Guide
- Let flooring acclimate 48 hours before cutting
- Always cut on the decorative side (visible side)
- Maintain 1/4" expansion gap around all edges
- Test cuts on scrap pieces first
- Keep tools sharp and clean
Step 1: Measuring and Marking the Cut Line
Accuracy saves 20% of your material budget.
Measurement Technique
- Measure twice, cut once: Use a metal tape measure and measure from the wall to the edge of the next plank
- Account for expansion gaps: Subtract 1/4" (6mm) from your measurement
- Mark the cutting line: Use a pencil and a T-square for straight lines
- Double-check: Measure from both ends and mark with small notches
💡 Pro Tip: For long runs, create a cutting template by marking the first plank and using it to trace others – ensures consistency.
Marking Tools
- ✏️ Carpenter's pencil: Best for marking on textured surfaces
- 📐 T-square: Essential for perfect 90° angles
- 🔍 Laser level: For large projects with multiple rooms
- 🧰 Chalk line: For long straight marks across the floor

⚠️ Measurement Mistakes to Avoid:
- Measuring only once (always verify)
- Forgetting expansion gaps
- Using soft pencils that smudge
- Ignoring room shape variations
Step 2: Making Straight Cuts
90% of cutting issues come from improper straight cuts.
Utility Knife Method (Recommended for Beginners)
- Score the decorative side: Make multiple light passes (3-4) rather than one deep cut
- Snap the plank: Bend the scored piece backward to break cleanly
- Cut the backing: Flip and score the attached backing layer
- Repeat: Process takes 10-15 seconds per plank
📊 Performance Data:
- Average time per cut: 12 seconds
- Material waste: 0.5% vs 15% with dull blades
- Success rate: 98% for first-time users
- Best for: Thickness ≤ 4mm
Circular Saw Method (For Professionals)
🔧 Setup Requirements:
- Reverse tooth blade (cuts on bottom)
- Plywood backing board to prevent tear-out
- Clamp plank securely before cutting
- Table saw preferred for long runs
⚠️ Safety First:
- Always wear safety glasses
- Use dust mask for fine particles
- Keep fingers 4" away from blade
- Unplug tools when changing blades

❌ Common Straight Cut Mistakes:
- Using dull blades (causes 60% of tearing issues)
- Cutting with decorative side down (tears surface)
- Not securing planks (causes chattering)
- Ignoring manufacturer cutting guidelines
Step 3: Cutting Curved Edges
Curved cuts require patience and the right blade – 85% of failures come from incorrect tool selection.
Essential Tools for Curves
Jigsaw
Fine-tooth blade
Utility Knife
For small curves
Rotary Tool
Dremel-style for intricate work
Jigsaw Technique
Best for: Doorways, radiator cuts, irregular walls
- Mark the curve with a compass or flexible curve
- Set jigsaw to medium speed (too fast causes melting)
- Start cutting slowly from the waste side
- Use masking tape on the cut line to reduce chipping
- Rotate the plank rather than the jigsaw for tighter curves
📏 Typical Curve Radii:
- Standard doorway: 3-4" minimum
- Radiator cutout: 6-8" recommended
- Column wrap: 2-3" for tight turns
Utility Knife Method
Best for: Small radius curves, touch-ups
- Make multiple light passes (5-8 cuts)
- Rotate the plank, not the knife
- Use a metal ruler as a guide for the first few passes
- Finish with a sanding block for smooth edges
⚠️ Key Difference: Utility knife requires more passes but offers better control for intricate work. Expect 2-3 minutes per curve versus 30 seconds with jigsaw.

💡 Pro Tip for Curves: For perfect circles (like HVAC vents), use a compass made from a string and pencil, then make multiple scoring passes before the final cut.
Step 4: Notching Around Obstacles
Proper notching prevents gaps that compromise waterproofing – the #1 cause of flooring failures.
Obstacle Types and Solutions
| Obstacle Type | Solution Tool | Cutting Technique |
|---|---|---|
| Door jambs | Oscillating multi-tool | Undercut jamb using scrap piece as guide |
| Vents/Registers | Jigsaw with fine blade | Cut square opening, then round edges |
| Pipes (3/4"-1") | Hole saw (for circular cuts) | Use scrap backing to prevent tear-out |
| Closet tracks | Utility knife + metal ruler | Score multiple times for clean edge |
Door Jamb Undercutting (Most Critical)
- Place a spare plank under the jamb as a guide
- Set oscillating tool depth to jamb thickness minus 1/16"
- Cut parallel to the jamb, not perpendicular
- Slide plank under after cutting – should fit snugly but not tight
- Test fit before final installation
⚠️ Common Door Jamb Mistakes:
- Cutting too deep (causes planks to sit too low)
- Not using a guide piece (results in uneven cuts)
- Cutting perpendicular to jamb (slows installation)
- Forgetting to account for expansion gap
Pipe Notching Technique
- Measure pipe location and mark plank
- Choose hole saw size matching pipe diameter plus 1/8"
- Place scrap plywood under plank to prevent tear-out
- Drill from decorative side at medium speed
- Clean edges with utility knife
- Create T-shaped cut in plank to allow installation around pipe
📏 Pipe Cutting Guidelines:
- Minimum pipe distance from wall: 2"
- Maximum pipe diameter for standard cuts: 1.5"
- Expansion gap around pipes: 1/4"

🔧 Essential Tools for Obstacles:
- Oscillating multi-tool: For door jambs and tight spaces
- Hole saw set: For pipes and vents
- Utility knife with snap-off blades: For final touch-ups
- Metal file: For smoothing rough edges
- Calipers: For precise measurements on pipes
5 Critical Cutting Mistakes That Destroy Your SPC Flooring
❌ Using Dull Blades
Result: Tearing, jagged edges, wasted material
Statistics show 62% of cutting failures come from dull blades. Replace blades every 8-10 planks or when you notice increased resistance.
❌ Cutting on the Wrong Side
Result: Damaged decorative surface, compromised waterproofing
Always cut on the decorative (printed) side. The backing layer is designed to tear cleanly without damaging the visible surface.
❌ Forgetting Expansion Gaps
Result: Buckling, uneven seams, installation failure
SPC flooring needs 1/4" (6mm) expansion space around all edges. This allows for thermal expansion and prevents buckling.
❌ Skipping the Test Cut
Result: Wasted material, rework, frustration
Always test cut on a scrap piece first. This reveals any issues with blade selection, technique, or plank quality before committing to the final piece.
❌ Rushing the Process
Result: Mistakes, damaged planks, installation delays
Professional installers take 15-20 seconds per straight cut. Rushing leads to errors that require expensive fixes.
✅ Quick Fixes for Common Mistakes
- Torn edges: Use clear nail polish to seal minor tears
- Uneven cuts: Sand edges with 120-grit sandpaper
- Wrong measurements: Adjust expansion gap accordingly
- Locked planks: Use tapping block to separate without damage
Advanced Cutting Techniques for Professional Installers
1. Cross-Cutting for Staggered Patterns
Technique: Cut planks at angles for herringbone or chevron patterns
- Mark cutting line at desired angle (typically 45° or 60°)
- Use a miter saw or miter box for precision
- Test fit before final installation
- Use wood glue on edges for extra stability in high-traffic areas
⚠️ Key Considerations:
- Minimum plank length for angled cuts: 12"
- Maximum angle for residential use: 60°
- Use clamping system to hold planks securely
- Account for additional material waste (15-20%)

2. Tapered Edge Cutting for Transitions
When to Use:
- Doorway transitions between rooms
- Height differences between flooring types
- Ramp installations
- Custom design features
Required Tools:
- Router with beading bit
- Jigsaw with guide
- Sandpaper (120-220 grit)
- Template or straight edge
💡 Pro Tip: Create a router jig from plywood for consistent tapered edges across multiple planks. This saves 30% installation time for transitions.
3. Large Format Panel Cutting
Market Data: Large format SPC panels (48" x 96") are growing at 22% annually due to faster installation times and fewer seams.
Special Tools Required
- Track saw: For perfectly straight cuts
- Panel lift: To handle 100+ lb panels safely
- Edge trimming tool: For factory edges
- Dust collection: Critical for indoor air quality
Cutting Process
- Mark all cut lines on both sides
- Score along cut lines first
- Use track saw for main cuts
- Clean factory edges with trimming tool
- Test fit before final placement
⚠️ Large Panel Warnings:
- Never lift panels alone (use team lift)
- Always wear back brace for heavy panels
- Cut in staging area, not final location
- Account for 50% heavier material (30-40 lbs per panel)
Pro Installation Tips for Flawless SPC Flooring Results
📏 Environmental Considerations
Before cutting or installing, ensure:
- Room temperature: 65-85°F (18-29°C)
- Relative humidity: 35-65%
- Acclimation time: 48-72 hours (unboxed)
- Subfloor moisture: < 4.5 lbs/1000 sq ft/24hr (calcium chloride test)
💡 Climate Impact: In humid climates, allow extra acclimation time and consider using a dehumidifier during installation.
🛠️ Workflow Optimization
Efficient cutting workflow:
- Pre-cut all planks: For straight runs, cut entire row at once
- Sort by length: Group similar lengths for consistent patterns
- Stage materials: Keep tools and pieces within easy reach
- Follow installation order: Work left to right, away from door
- Clean as you go: Remove dust and debris immediately
⏱️ Time-Saving Tip: For projects over 100 sq ft, pre-cutting all pieces can save up to 2 hours of installation time.
🔧 Quality Control Checklist
| Check | Requirement | Action |
|---|---|---|
| ✓ | Cut accuracy | Measured within 1/16" (1.5mm) |
| ✓ | Edge quality | No chips or tears visible |
| ✓ | Locking mechanism | Engages smoothly without gaps |
| ✓ | Expansion gap | Consistent 1/4" around all edges |
| ✓ | Pattern alignment | Seamless transitions between planks |
📊 Performance Verification: After installation, perform a water test by pouring 1 cup of water on the floor and checking for absorption after 1 hour. No absorption = successful installation.
Frequently Asked Questions About Cutting SPC Vinyl Plank Flooring
What's the best tool for cutting SPC flooring?
For beginners: A high-quality utility knife is 80% of what you need. It's affordable, portable, and effective for most cuts.
For professionals: A circular saw with a fine-tooth blade or jigsaw with a wood/metal cutting blade provides cleaner results for large projects.
Key consideration: Always cut on the decorative side and use sharp blades – 60% of cutting issues come from dull tools.
How do I prevent the plank from tearing when cutting?
Tearing occurs with dull blades or incorrect cutting technique. Follow these steps:
1. Replace blades every 8-10 planks or when you feel increased resistance
2. Make multiple light passes rather than one deep cut
3. Cut on the decorative side (the backing layer tears cleanly)
4. Use masking tape on the cut line for curved edges
5. Support the plank with a stable surface during cuts
Industry data shows proper blade maintenance reduces tearing incidents by 75%.
What's the proper expansion gap for SPC flooring?
SPC flooring requires a 1/4 inch (6mm) expansion gap around all vertical surfaces including walls, door jambs, cabinets, and pipes.
Why it's critical:
- Allows for thermal expansion/contraction
- Prevents buckling in humid conditions
- Accommodates subfloor movement
- Maintains waterproof integrity
Use spacers during installation to maintain consistent gaps, then cover with baseboards or quarter-round molding after completion.
Can I use a table saw to cut SPC flooring?
Yes, but with precautions:
1. Use a fine-tooth blade (80-tooth minimum) for clean cuts
2. Cut on the decorative side to prevent surface damage
3. Use a zero-clearance insert to prevent tear-out
4. Feed slowly – SPC is harder than regular vinyl
5. Always wear safety gear (glasses, mask, push stick)
Alternative: A track saw provides better control for long straight cuts without the safety risks of a table saw.
How do I cut around pipes without damaging the floor?
Cutting around pipes requires precision and the right technique:
1. Measure pipe location and mark on the plank
2. Choose correct hole saw size: Pipe diameter + 1/8"
3. Use scrap plywood backing to prevent tear-out
4. Drill from decorative side at medium speed
5. Create T-shaped cut in plank for installation
6. Seal edges with clear silicone if desired
Pro tip: For multiple pipes, cut templates from cardboard first to ensure accuracy before cutting the actual plank.
What's the difference between scoring and cutting SPC flooring?
Scoring: Making multiple shallow cuts along the marked line before snapping the plank. This is the recommended method for utility knife cuts.
Cutting: Making a single, deep cut through the entire thickness of the plank. This can lead to tearing and is generally not recommended for SPC.
Why scoring wins:
- Cleaner edges with less tearing
- Better control for beginners
- Reduces blade wear
- Works on all SPC thicknesses
Industry standards recommend scoring for 95% of SPC cutting applications.
Can I reuse SPC planks if I make a mistake in cutting?
Yes, but with limitations:
1. Minor errors (1/8" or less): Can often be adjusted by shifting the plank during installation
2. Large errors (more than 1/4"): Planks can usually be re-cut if the locking mechanism is intact
3. Damaged locking system: Planks may need to be discarded
Reuse tips:
- Save leftover pieces as spares for future repairs
- Store damaged planks flat in original packaging
- Test fit re-cut planks before final installation
- Use clear silicone to seal visible edges if needed
Most installers report 10-15% material waste on first projects, which decreases to 5% or less with experience.
How do I achieve professional-looking curved cuts?
Professional curved cuts require the right tools and technique:
1. Choose the right tool: A jigsaw with fine-tooth blade is essential for smooth curves
2. Mark accurately: Use a compass for circles or flexible curve for irregular shapes
3. Cut from the waste side: Always cut away from the visible edge
4. Multiple light passes: 5-8 scoring passes before final cut
5. Finish with sandpaper: 120-220 grit for smooth edges
Pro tip: For perfect circles (like HVAC vents), create a template from cardboard first, then trace onto the plank.
Industry benchmarks show proper curved cutting techniques reduce chipping by 85% compared to freehand methods.
Why Builders Worldwide Trust Sothink's SPC Flooring for Cutting & Installation
Leading flooring contractors, architects, and commercial developers rely on our SPC flooring for:




Industry-Leading Certifications & Compliance





John Smith
Master Flooring Contractor
"Sothink's SPC flooring cuts cleaner than any other brand I've used. The locking system is perfect – no gaps, no failures. Their technical support helped me solve a tricky curved cut issue in under 10 minutes."
⭐⭐⭐⭐⭐

Maria Garcia
Principal Architect, Garcia Design Group
"We specify Sothink flooring in 90% of our residential projects. The consistency in thickness and cutting ease saves us hours per installation. Their large format panels are a game-changer for open-concept spaces."
⭐⭐⭐⭐⭐

David Kim
Director of Construction, Kim Properties
"For our hotel renovation projects, we needed flooring that could handle 24/7 traffic. Sothink's SPC has exceeded expectations. The cutting precision means our installers can work faster without sacrificing quality."
⭐⭐⭐⭐⭐



Ready to Cut Perfect SPC Flooring Every Time?
Join thousands of professionals who trust Sothink's SPC flooring for flawless installations
📞 Immediate Assistance
Our flooring experts are ready to help
📧 Professional Quote
Get pricing for your project
📱 WhatsApp Support
Instant messaging for cutting questions
🎁 Limited Time Offer
Free Cutting Template Set with every bulk order (100+ sq meters) – save hours on your next project!
Offer valid through December 2025
Real Customer Reviews: What Builders Say About Our Cutting Process

James T., New York
Interior Designer
"The cutting precision on Sothink flooring is unmatched. I installed 500 sq feet last month and had to replace only 3 planks due to my own measurement errors – that's 99% efficiency!"
⭐⭐⭐⭐⭐

Sarah M., Miami
Homeowner & DIYer
"I was nervous about cutting around my curved kitchen island. The jigsaw technique worked perfectly! The instructions were clear and the result looks professional."
⭐⭐⭐⭐⭐

Carlos R., Texas
Flooring Contractor
"Sothink flooring cuts faster than the competition. My team can install 30% more square footage per day. The consistent thickness means no adjustments during installation."
⭐⭐⭐⭐⭐

Lisa K., California
Architectural Assistant
"The large format panels saved my project timeline. Cutting 4x8 panels went smoothly with the track saw. Installation time dropped from 2 days to 8 hours!"
⭐⭐⭐⭐⭐
About the Author

Michael Chen
Senior Flooring Specialist | 15+ Years in SPC Installation
✅ 15 Years: Specializing exclusively in SPC vinyl plank flooring
✅ 5,000+ Projects: Completed across residential, commercial, and hospitality sectors
✅ 98% Satisfaction: Rate among clients and contractors
Michael has trained over 200 flooring professionals worldwide on proper SPC cutting techniques. His expertise spans from traditional utility knife methods to advanced large-format panel installations. Michael's cutting process has been adopted by major flooring retailers and contractors across North America and Europe.
🔧 Specialties:
- SPC flooring cutting optimization
- Large-format panel installation
- Commercial flooring specifications
- Troubleshooting cutting challenges
Data Sources & Industry References
📊 LinkedIn: SPC Flooring Market Outlook
📊 Yahoo Finance: Wall Panel Market Analysis
📊 Sothink Testing Lab: SPC Durability Reports
📊 MDPI: Moisture Resistance Studies
📊 Springer: Wear Layer Durability Research
📊 MarketResearchFuture: Industry Growth Reports
📊 Facebook Groups: Contractor Experiences
📊 ResearchGate: Technical Papers
📊 Sothink Quality Control: Internal Testing Data


 +86 31185293045
 qian@ss711.com